This page links to demonstration projects created in 3DM Analyst that can be used with 3DM Viewer.
| Project | Camera | Description |
|---|---|---|
 UAV (24MB) |
12.7 megapixel Canon EOS 5D | A sample project using images captured from ADAM's UAV at a flying height of 400 ft. It took 3DM Analyst 2.3 just 58 seconds to generate over 273,000 DTM points in this model on a 2.4GHz Intel Core 2 Duo PC. (This project also demonstrates 3DM Analyst's contour generation and gridded DEM generation features. Click on the "Show Contours" and "Show DEM" icons in the toolbar to turn them on and off.) |
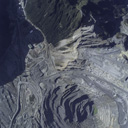 Freeport (9MB) |
MFDC Hasselblad 555 ELD with a 16 megapixel digital back | A relative-only project using images taken from a helicopter flying above PT Freeport's mine in Irian Jaya. It took 3DM Analyst 2.1 4 minutes 9 seconds to generate the 99,595 DTM points in this model on a 2GHz Athlon XP 2400+ PC. |
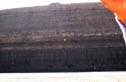 Goonyella (8MB) |
5.3 megapixel Nikon D1x | A single model from a 700m strip of models along a pit wall at BMA Coal's Goonyella mine in Queensland. It took 3DM Analyst 2.1 4 minutes 42 seconds to generate the 113,249 DTM points in this model on a 2GHz Athlon XP 2400+ PC. The model is approximately 40m wide. |
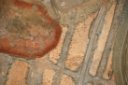
 Saraji (12MB) |
5.3 megapixel Nikon D1x | A single model from BMA Coal's Saraji mine in Queensland. It took 3DM Analyst 2.1 4 minutes 35 seconds to generate the 154,820 DTM points in this model on a 2GHz Athlon XP 2400+ PC. |
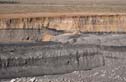
 Model 1 (6MB) |
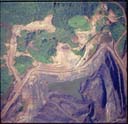
Rollei 55mm film camera scanned at 20 microns on a Vexcel Ultrascan 5000 (equivalent to about 7.5 megapixels) | An aerial model from a mine in Venezuela. It took 3DM Analyst 2.1 2 minutes 36 seconds to generate the 60,120 DTM points in this model on a 2GHz Athlon XP 2400+ PC. |
 Dino (20MB) |
8 megapixel Olympus C8080WZ compact digital | Some dinosaur footprints courtesy of the National Science and Technology Centre of the US Bureau of Land Management. Using 3DM Analyst 2.3 it took just 45 seconds to generate over 190,000 DTM points on a 3.33GHz Intel i7 PC. View a .wmv (25MB) showing 3DM Analyst processing the images from scratch, completely automatically. (More information about some of the work that BLM is doing with our software can be obtained from here.) |
 Bucket (6MB) |
8 megapixel Canon EOS 20D digital SLR | A model of a bucket used for volume calculation. It took 3DM Analyst 2.2 1 minute 18 seconds to generate over 75,000 DTM points on a 2.4GHz Athlon X2 4600+ PC. |
 Stockpile (6MB) |
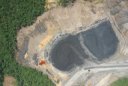
6 megapixel Canon EOS 300D digital SLR | A model of a stockpile used for volume calculation. It took 3DM Analyst 2.2 1 minute 7 seconds to generate over 137,000 DTM points on a 2.4GHz Athlon X2 4600+ PC. |
 Truck (11MB) |
8 megapixel Canon EOS 20D digital SLR | A model of a truck used for volume calculation. It took 3DM Analyst 2.2 1 minute 4 seconds to generate over 124,000 DTM points on a 2.4GHz Athlon X2 4600+ PC. |
 Dental (4MB) |
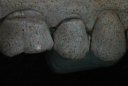
2 x 6 megapixel Canon EOS 300D digital SLRs | A model of a patient's teeth for denture wear analysis. A mould of the patient's teeth was created and then used to generate a replica made out of a material with texture suitable for DTM generation. 3DM Analyst was used to automatically generate a DTM of the replica accurate to 15 µm with an average point spacing of 55 µm. |
3DM Viewer Quick Start
Download one of the .zip files above and extract the contents.
Launch 3DM Viewer by double-clicking on 3DM Viewer 2.2.exe.
Select the menu item File | Open...
Browse to and select the .Vwr file for the project you wish to load. 3DM Viewer will then load the project and show a summary of what items were successfully loaded. For large projects, this could take a while.
Click on the Image Transfer button (
 ) to toggle between the original
images taken by the camera (with control points overlaid) and the resampled images generated by the software
(with DTM overlaid). Click on the Zoom In (
) to toggle between the original
images taken by the camera (with control points overlaid) and the resampled images generated by the software
(with DTM overlaid). Click on the Zoom In ( ) and Zoom Out (
 ) buttons to adjust the magnification of the images.
Click on the 3D View tab at the bottom of the window to change views. (On slower PCs this may also take a while.) The DTM (shown as red triangles) and the camera positions will be displayed. Move the mouse with the left mouse button held down to view the DTM from different angles, and move the mouse up and down with both mouse buttons held down to zoom in and out.
Click on the Show Triangles button (
 ) to switch between wireframe and textured view mode.